How to Extend Display on Mac?
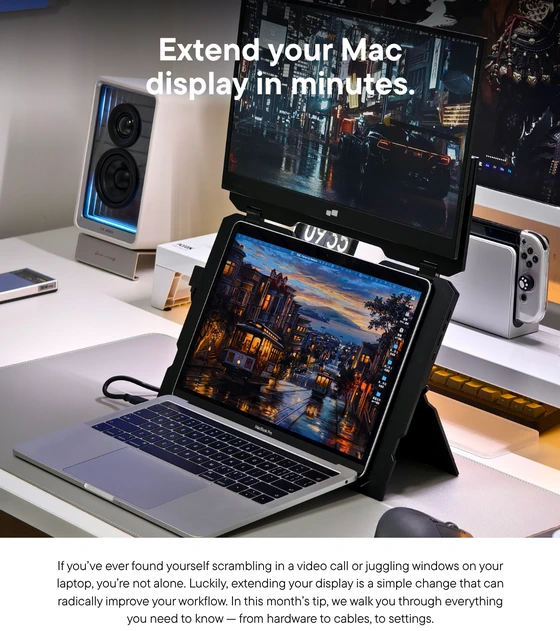
Suppose you have to attend an essential meeting through a video-conferencing platform, and you do that on your Mac. While the conference is going on, the party on the other side requests that you share your screen so everyone can view the reports you worked on. You politely accept, but now you start to panic as the report window or the online conference can remain open. You cannot ask them to wait while you help yourselves. The problem could have easily been solved by extending the display on the Mac. The extension is a lifesaver in such situations, but the display can elevate your productivity and guarantee a better user experience. The blog will dig into the requirements for extending the display and how to extend it on a Mac.
Requirements For Extending Display
Extending a display on a Mac is certainly not rocket science; however, you have to keep these requirements in mind to ensure the proper working of the monitor. Look into hardware requirements and software requirements.
Hardware Requirements
Mac Computer
– Macs with Thunderbolt 2 or HDMI ports can connect to up to two displays.
– Mac mini (Intel) can connect to up to two displays depending on the model year.
– Macs with Thunderbolt 3 (USB-C) ports can connect to one display per port.
External Monitors
Duex Plus has auto rotation and offers an eye-care mode. The monitor is ideal for 14” and larger laptops. You can plug in and play via a USB-C port.
Appropriate Adapters and Cables
Lay your hands on compatible adapters and cables. The most effective ones are:
– HDMI- Connect the HDMI cable to a Mac with an HDMI port to the HDMI display.
– USB-C- You can use USB-C to connect a Mac with Thunderbolt 3 ports to a DisplayPort display.
– Thunderbolt- The most common cable for connecting a recent version of Mac to a Thunderbolt display.
Software Requirements
MacOS Version
Regarding software requirements, you need to look into the versions that support the extended displays. The good news is that all modern macOS versions support the feature as long as they still receive Apple updates. Hence, you need not worry or run to the market to purchase another monitor.
How To Extend Display On Mac? Step-By-Step Guide
Before delaying any further, we will help you learn how to extend display on Mac through this step-by-step guide. Please read carefully as we discuss connecting the external monitor and configuring display settings.
Connecting The External Monitor
1. Identify Ports. In order to connect the external monitor, you have to identify the ports; therefore, locate them on your Mac and external monitor. On Mac search for ports. These will be on the sides or back of your Mac. Usual types consist of Thunderbolt 3 (USB-C), HDMI, and Mini DisplayPort. On the other hand, explore the back side of the external monitor for ports, where you can insert HDMI, DisplayPort, or USB-C.
2. Choose The Right Cable/Adapter. The right cable/adapter plays a critical role in connecting the external monitor, as you can’t expect any random cable to serve the purpose. Hence, do the following: First, identify the Mac’s display port. It can be Thunderbolt 3, HDMI, etc. Then, check your extended monitor’s input ports. It can vary between HDMI, DisplayPort, or USB-C. Now, select a matching cable that functions well with both ports, such as Thunderbolt 3 to Thunderbolt 3 cable. If the ports are different, then select adapters like USB-C to HDMI adapters for USB-C Macs and HDMI monitors.
3. Physical Connection. Switch On The Power: Insert the power cables for the external monitor and Mac. Cable Connection: Use the correct adapter or cable so you can connect your Miac’s display port to the monitor’s input port, where you can connect the other end of the cable. Enable the Displays: Once you have made the cable connection, enable the displays on the Mac and the external monitor. Display Settings: You can experiment with your display settings on your Mac. Just go to System Settings or System Preferences. Then click on adjust screen arrangements and customize settings for your extended display.
Configuring Display Settings
1. Arrangement Tab: Open “System Preferences” and go to “Displays.” Click on the “Arrangement” tab. Drag and position the displays to your preferred setup. The white bar at the top represents the primary display.
2. Resolution and Orientation: In the “Displays” menu, adjust the resolution settings to fit your needs. Change the orientation between portrait and landscape modes as desired.
Conclusion
Now that you know how to extend the display on Mac, try setting up an extended display at your workstation to avoid last-minute meeting moments.
Did this article help you? If so, please tell me in a comment what do you think about it.
Don’t miss any of our future video tutorials, follow us on Youtube. Like us on Facebook. Join our Best Deals Telegram Channel. Join our Android TV Box Firmware Updates Telegram Channel. Subscribe now to our newsletter. If you need Tech Reviewer or Youtube Influencer read this. Donate now here to support CGR Team!