How to Recover Deleted Files from External Hard Drive on Mac
It happened to me couple days back. I had plugged in my external hard drive to free up some space on my Mac, and in a rush, I deleted a folder thinking it was just old duplicates. Moments later, I realized that folder contained months of project files. An external drive doesn’t have the same safety net as the Trash on Mac, once you hit delete, it feels like everything is gone for good. But here’s the thing, those files weren’t gone forever. With the right approach, I was able to get them back.

If you’ve just accidentally deleted files from your external hard drive on a Mac, don’t worry. You can recover them. Let’s break down how Mac data recovery works, the different methods you can try, and what finally helped me recover my files.
Files Don’t Disappear Right Away
When you delete something from an external hard drive, the files don’t instantly vanish into thin air. Instead, macOS marks the space they occupied as available for new data. Think of it like erasing a name tag from a mailbox, the box itself is still there until someone else moves in. This is why quick action is so important. If you keep using the drive and new files are copied over, your deleted files might be overwritten, making recovery nearly impossible. So, the first rule of Mac file recovery, stop using the external drive the moment you realize files are missing.
First Step: Check the Trash
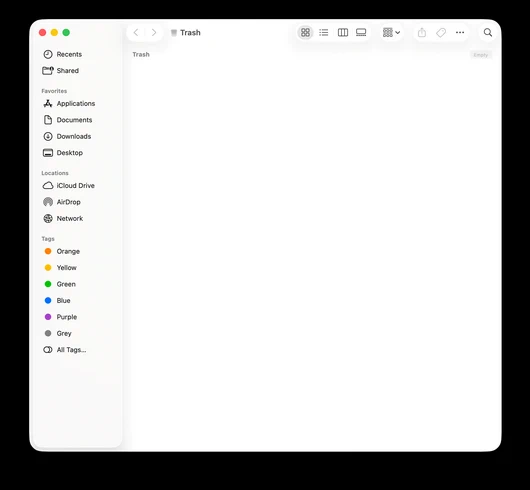
Before diving into more advanced methods, check the Trash on your Mac. If you deleted files while the external hard drive was connected, sometimes they go straight into the Trash instead of being wiped instantly.
1. Connect your external hard drive to your Mac.
2. Open the Trash from the Dock.
3. Look for your missing files.
4. If you find them, right-click and select Put Back.
When I first lost my files, I had no luck here, but it’s always worth a quick check.
Second Step: Look at Backups
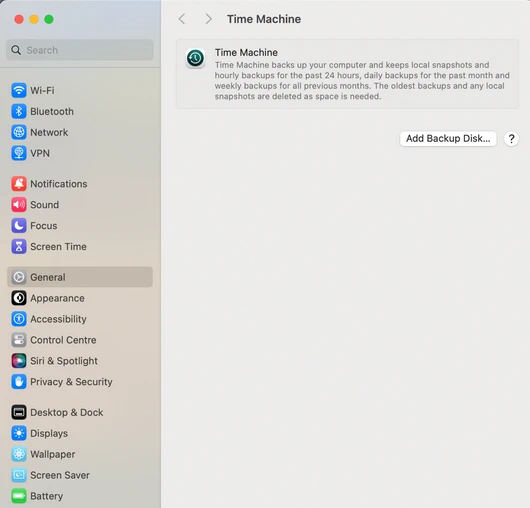
Many Mac users have Time Machine or another backup solution running in the background. If you’re one of them, now’s the time to see if your deleted files are waiting in a backup.
– Open Time Machine from the menu bar.
– Navigate to the date before the files were deleted.
– Restore the missing folder or file to your external hard drive.
Sadly, I wasn’t backing up my external drive at the time, lesson learned. But if you’ve set up Time Machine, it can save you from a lot of stress.

Third Step: Mac Data Recovery Software
This is where things started working for me. Since my files weren’t in the Trash and I didn’t have backups, the only way forward was specialized Mac data recovery software. Last year I tested Stellar Data Recovery Professional for Mac. Therefore, instantly I opted to get back my files using this tool. These tools can scan an external hard drive at a much deeper level, locating files that macOS itself can’t see.
Here’s how I used (Stellar Data Recovery Professional for Mac):
1. Connect the external hard drive to your Mac.
2. Download and install the Mac Data Recovery software on your Mac (not on the external drive to avoid overwriting).
3. Launch the program and select the type of files you want to recover (photos, documents, videos, or everything).
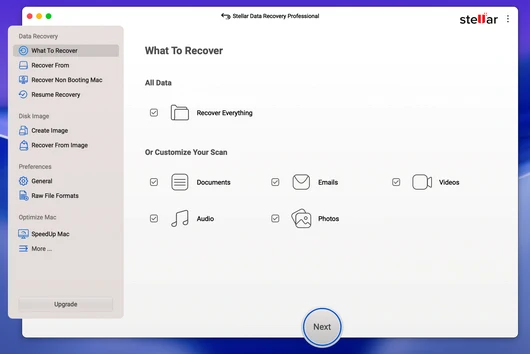
4. Choose the external drive as the target for scanning.
5. Run a Quick Scan first. If your files don’t show up, switch to Deep Scan for a more thorough search.
6. Once the scan completes, preview the files to confirm they’re intact.
7. Select the files you want and click Recover. Save them to a different location, not back on the same external hard drive.
Within half an hour, I had my folder back, along with a few old photos I didn’t even remember losing. It felt like a small miracle.
Things to Keep in Mind While Recovering
– Don’t write new data to the drive before recovery. Even saving new files or running a repair tool can overwrite deleted data.
– Patience pays off. Deep scans take time, especially on large external hard drives, but they can uncover files you thought were gone forever.
– Always recover to a different drive. Saving recovered files back to the same drive risks corrupting them.
Preventing File Loss in the Future
After going through the stress of nearly losing everything, I made a few changes to how I handle files on my Mac. If you’ve just recovered your data, now is the perfect time to prevent future disasters.
1. Set up Time Machine for external drives. You can include external drives in Time Machine backups by going to Preferences and checking the box for the drive.
2. Keep a secondary backup. A simple cloud storage account or another external drive can act as a safety net.
3. Be cautious with “Delete.” On external drives, the Trash doesn’t always behave the same way as your Mac’s internal disk. Double-check before confirming.
4. Use Disk Utility First Aid regularly. This helps spot early issues with external drives before they fail completely.
My Takeaway From the Experience
Looking back, accidentally deleting those files was a blessing in disguise. It forced me to learn how Mac data recovery really works and to respect the importance of backups. At first, it felt like I had made a mistake that couldn’t be undone. But by acting quickly, avoiding new data on the drive, and using proper recovery software, I was able to recover deleted files without too much damage. The biggest lesson? External hard drives are convenient, but they’re also fragile when it comes to data safety. One wrong click can wipe out weeks or months of work. But with the right tools and a bit of patience, Mac file recovery is absolutely possible.
Summary
I deleted an important folder from my external hard drive on my Mac by accident. At first, I thought everything was lost. The files weren’t in Trash, and I didn’t have a backup. But instead of panicking, I worked through the options: checked Trash, looked at backups, tried Terminal, and finally used Mac data recovery software. That’s what brought my files back. If you ever find yourself in the same situation, don’t give up. Stop using the drive immediately, scan it with recovery software, and restore your files safely. And once you’ve got them back, set up backups so you don’t have to go through the same stress again.
Did this article help you? If so, please tell me in a comment what do you think about it.
Don’t miss any of our future video tutorials, follow us on Youtube. Like us on Facebook. Join our Best Deals Telegram Channel. Join our Android TV Box Firmware Updates Telegram Channel. Subscribe now to our newsletter. If you need Tech Reviewer or Youtube Influencer read this. Donate now here to support CGR Team!