How to Connect OBSBOT Talent with OBSBOT Products
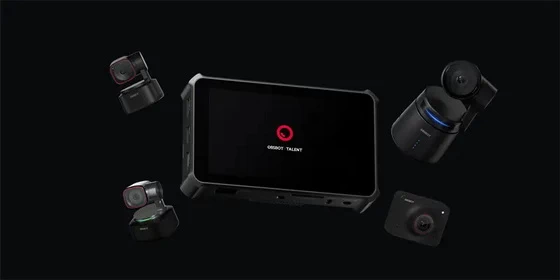
Welcome to the OBSBOT Talent Connection Guide. OBSBOT Talent is a perfect combination of encoder, switcher, recorder, and monitor, and plays a crucial role in the OBSBOT ecosystem. This tutorial will walk you through how to make connections between OBSBOT products and your OBSBOT Talent.
Part 1: Connect with OBSBOT Tail Air
USB Connection
Before connecting your device with OBSBOT Talent, turn the UVC mode on in the Obsbot Start App or OBSBOT Center software.
You can utilize a USB-A cable to connect the OBSBOT Tail Air to OBSBOT Talent directly.
Tap on the main screen.
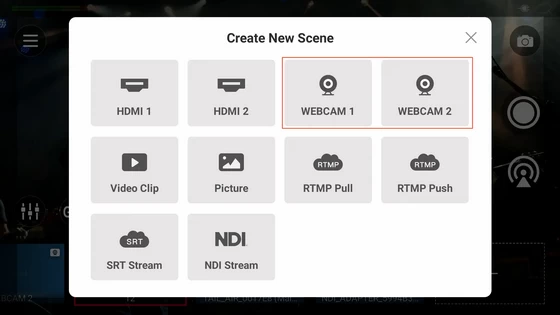
Select a source in the Create New Scene window to add, and then it enters the Scene Editor page.
Select WEBCAM 1 or WEBCAM 2.
After selection, the video input of the OBSBOT Tail Air will appear on your Talent device.
Micro HDMI to HDMI Connection
You can utilize a Micro HDMI to HDMI cable to directly connect the OBSBOT Tail Air to OBSBOT Talent. Due to its Micro HDMI port (Type D HDMI), it supports crystal-clear video output up to 4K@30fps and 1080P@60fps.
Tap on the main screen.
Select a source in the Create New Scene window to add, and then it enters the Scene Editor page.
Select HDMI 1 or HDMI 2.
Once selected, the OBSBOT Tail Air video Input will appear in your Talent device.
Network Connection
Before linking the OBSBOT Tail Air to OBSBOT Talent, you’ll need:
OBSBOT Tail Air camera
Obsbot Start App or OBSBOT Center software
USB-C to Ethernet Adapter (necessary for a wired connection)
Net Switcher or Router (necessary for a wired connection)
Ethernet Cable (necessary for a wired connection)
NDI Connection
Wired Connection
Utilize a USB-C to Ethernet Adapter to connect your OBSBOT Tail Air to a Net Switcher or Router.
Use Talent’s Ethernet port to connect your OBSBOT Talent to a network switcher or router.
Wireless Connection
Drag OBSBOT’s status bar and find the Wi-Fi setting.
Connect your OBSBOT Tail Air and OBSBOT Talent to the wireless network.
Make sure your OBSBOT Tail Air and OBSBOT Talent are all on the same network.
Note:
Your OBSBOT Tail Air needs to turn the NDI mode on with an activated NDI License Key in the Obsbot Start App or OBSBOT Center software.
Step-by-Step Guide
Tap on the main screen.
Select a source in the Create New Scene window to add, and then it enters the Scene Editor page.
Select NDI Stream.
Select your OBSBOT Tail Air, you need to connect with Talent.
After selection, the video input of the OBSBOT Tail Air will appear on your Talent device.
You can find the PTZ control on the main screen.
You can control OBSBOT webcam through the PTZ control.
SRT Connection
Open Obsbot Start App on your phone and connect your Tail Air with it.
Click “More Settings” to call out the settings panel.
Click “SRT Settings” to enter the setting interface, you can also set in advance the frame rate, resolution, and further SRT parameters in “Media Setting”.
Switch to Listener mode and configure accordingly. The local IP address and local port are displayed by default and cannot be modified.
Finish the configuration, click “Save”, return to the upper setting interface, and enable SRT mode.
Tap on the OBSBOT Talent main screen.
Select a source in the Create New Scene window to add, and then it enters the Scene Editor page.
Select SRT Stream.
After entering the interface to create an SRT stream, you can add and modify the SRT stream information you set at OBSBOT Tail Air. After finishing the settings, click “Create”.
After selection, the video input of the OBSBOT Tail Air will appear on your Talent device.
RTMP Connection
Tap on the OBSBOT Talent main screen.
Select a source in the Create New Scene window to add, and then it enters the Scene Editor page.
Select RTMP Push. You can find the RTMP URL.
Open Obsbot Start App on your phone and connect your Tail Air with it. Press and hold the Live Stream/Record Button to access the live stream interface.
Select the “RTMP” option, then press “+” to create an RTMP stream.
Input the corresponding information from the OBSBOT Talent and click “Add”.
Click the “Start” button.
After entering the interface to create an RTMP stream, you can add and modify RTMP stream information you set at OBSBOT Tail Air. After finishing the settings, click “Create”.
After selection, the video input of the OBSBOT Tail Air will appear on your Talent device.
Part 2: Connect with OBSBOT Webcam Series
Connect the Webcam device to the Talent using the USB cable, and the Webcam device will be switched on synchronously.
Move to the next step when the webcam green light is on.
Tap on the main screen.
Select a source in the Create New Scene window to add, and then it enters the Scene Editor page.
Select WEBCAM 1 or WEBCAM 2.
After selection, the video input of the OBSBOT webcam will appear on your Talent device.
You can find the PTZ control on the main screen.
You can control OBSBOT webcam through the PTZ control.
If one USB device is connected, choose WEBCAM 1, then the device will be bound with WEBCAM 1 automatically. When you add WEBCAM 2, the no-signal screen will be displayed, and vice versa.
Start building up your streaming system with your OBSBOT Talent with OBSBOT products today. For more news and guides, visit our website and stay tuned for updates.
Did this article help you? If so, please tell me in a comment what do you think about it.
Don’t miss any of our future video tutorials, follow us on Youtube. Like us on Facebook. Join our Best Deals Telegram Channel. Join our Android TV Box Firmware Updates Telegram Channel. Subscribe now to our newsletter. If you need Tech Reviewer or Youtube Influencer read this. Donate now here to support CGR Team!